Blood Bowl Orcs - Drybrushing
In my previous post I finished painting the base coats onto six Games Workshop plastic Blood Bowl Orcs. A wash of Agrax Earthshade darkened the recesses of the models and provided quick definition on the details. Anytime you can wash the entire model like this will save a ton of time.
The next step outlined in the GW video was to brighten up the red. I was shocked to see them suggest drybrushing red onto the miniature.
 Drybrushing is an oft-scorned technique that has fallen out of favor in recent years. It can get messy and chalky if done improperly, but I used it to good effect on my previous Dropfleet Scourge and UCM ships, as well as a couple of Epic Rhinos.
On the picture above, you can see the results: the red was brightened significantly, at the expense of getting color onto adjacent areas. However, note that the adjacent areas affected are all the raised parts... which will receive highlight colors later. The picture below shows the models after some other highlights have been painted.
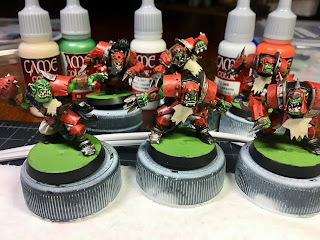 The red that was scrubbed onto the nearby bits has been covered at this point by the other highlights. Since the drybrushing was done properly, there wasn't any in the recesses. You can still spot some on the metal parts, as they have yet to be highlighted yet.
So, the results speak for themselves: these figures look great, and the red really pops. I'll have to consider using this controlled drybrushing on other projects, and not just space ships.
Next up: the finishing touches.
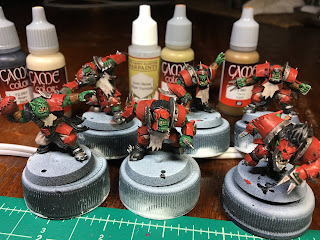
The next step outlined in the GW video was to brighten up the red. I was shocked to see them suggest drybrushing red onto the miniature.

On the picture above, you can see the results: the red was brightened significantly, at the expense of getting color onto adjacent areas. However, note that the adjacent areas affected are all the raised parts... which will receive highlight colors later. The picture below shows the models after some other highlights have been painted.

So, the results speak for themselves: these figures look great, and the red really pops. I'll have to consider using this controlled drybrushing on other projects, and not just space ships.
Next up: the finishing touches.


Comments
Post a Comment